|
|
|
House Renovation |
|
|
|
I added this page for friends and family who are interested in our summer project of renovating our house. The project has begun in earnest, and I will try to add pictures as work progresses. Most of my time will be involved in the barn project in preparation for doing the cabinetry in the house. I will be doing most of the custom cabinetry and woodwork. |
|
|
|
 |
|
 |
|
 |
|
|
|
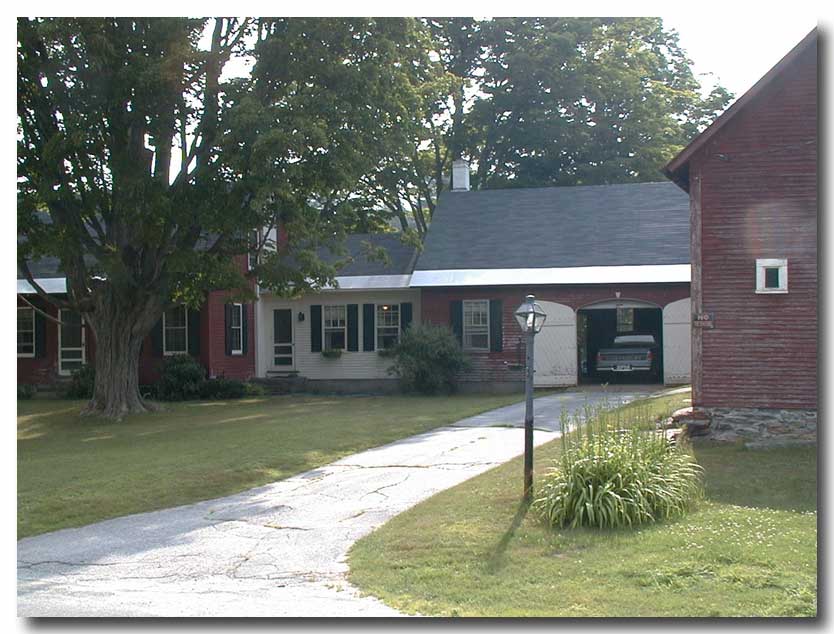
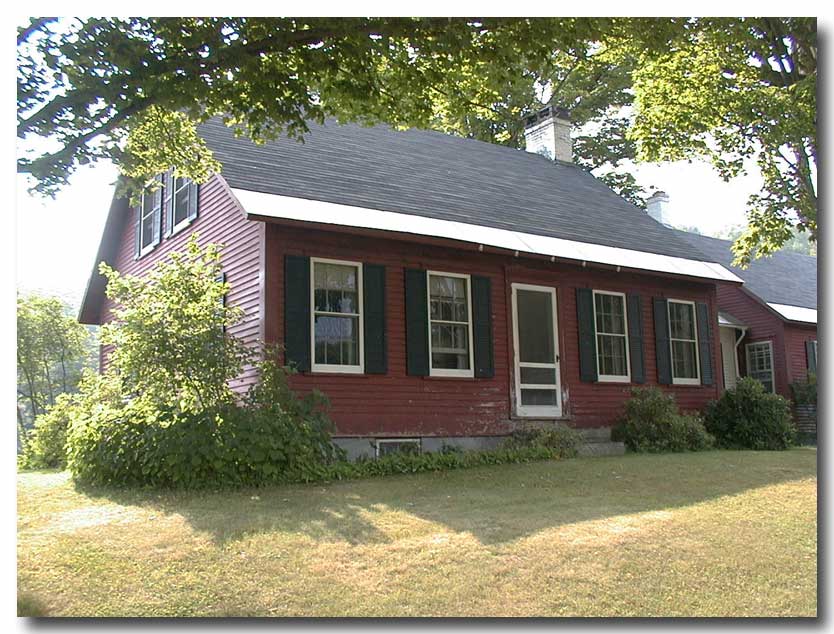
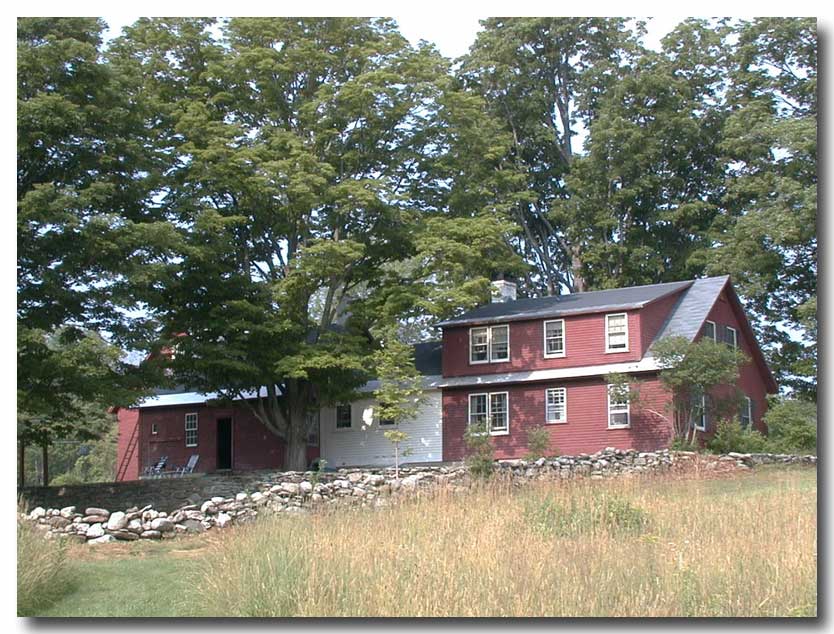
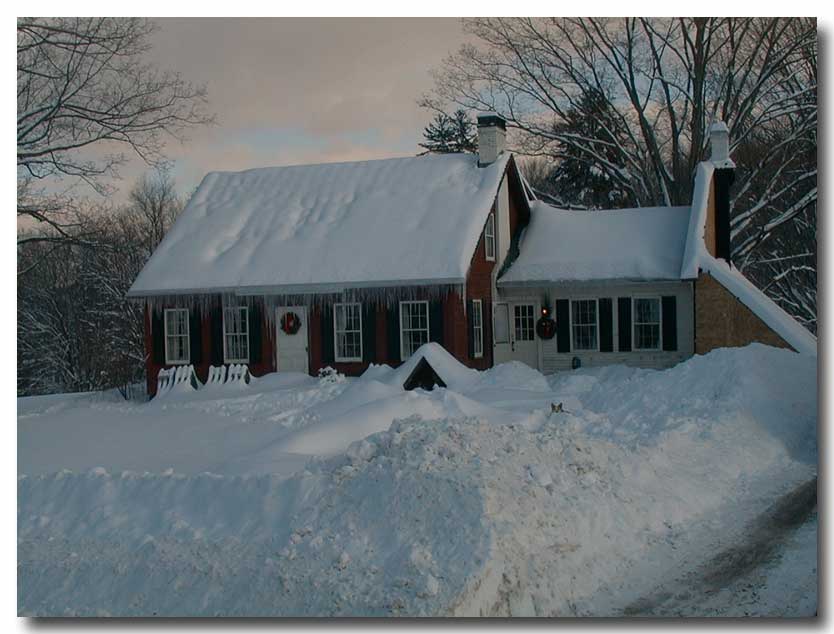
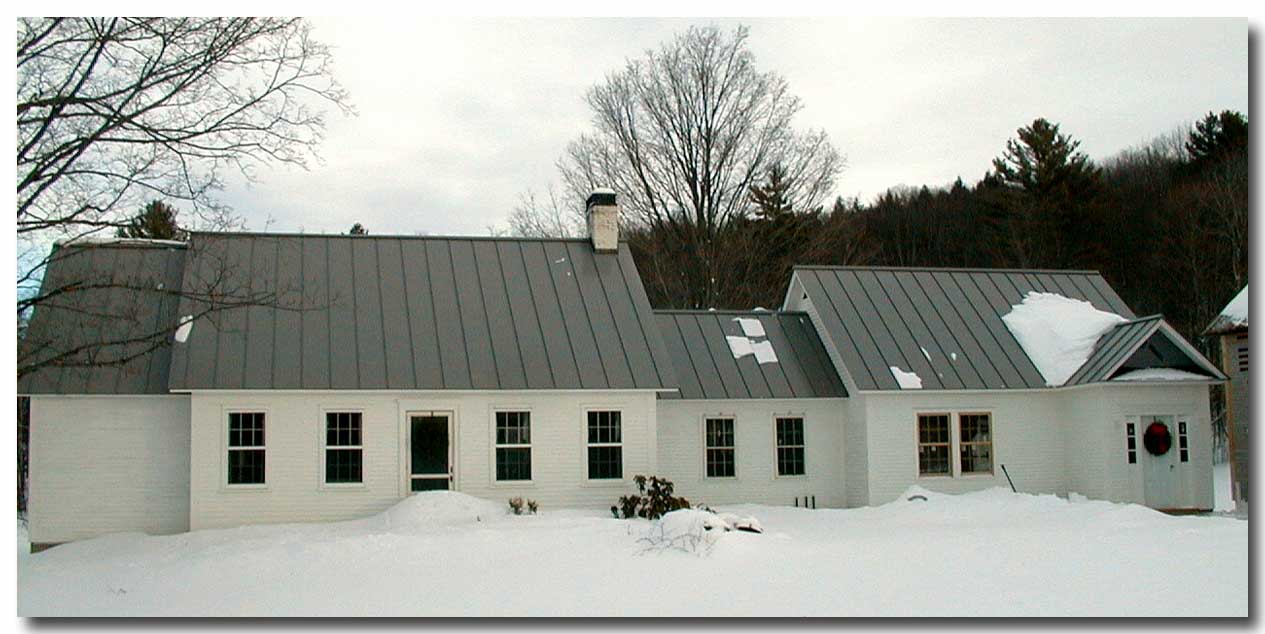
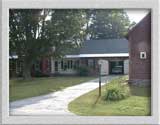
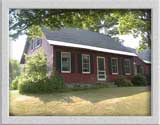
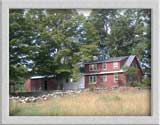
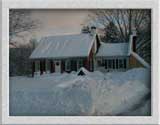
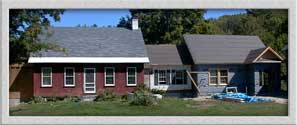
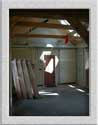
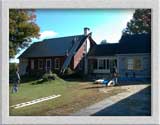
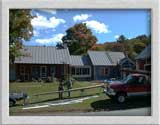
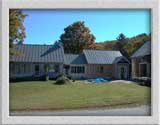
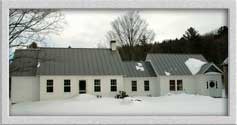
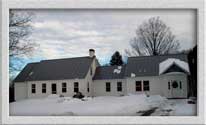
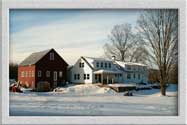
These are pictures of the house about 4 years ago. We were living in Alaska at the time, and Susan and Colin were living here in the summers. The front tree had a major limb break and fall on the house two winters ago, and had to be removed. Luckily, no major damage was done to the house. |
|
|
|
 |
|
 |
|
 |
|
|
|
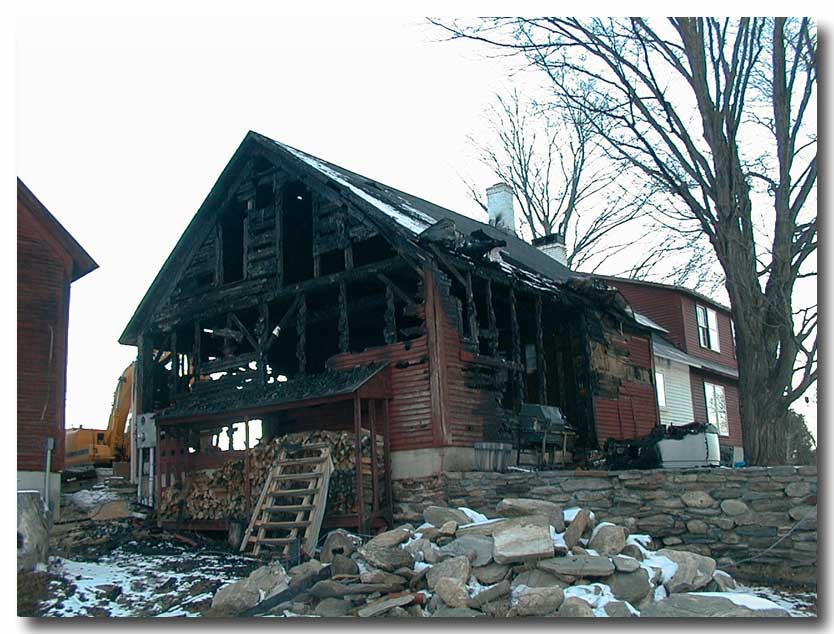
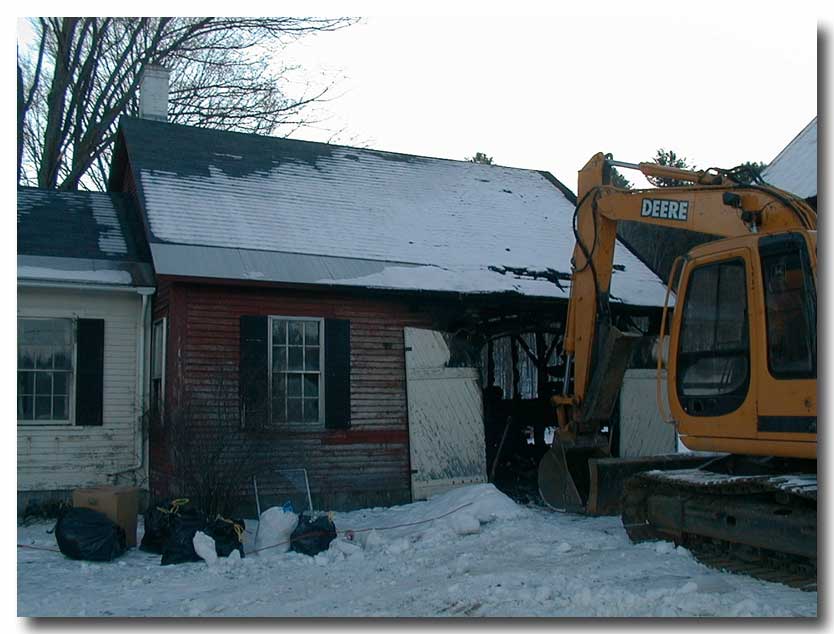
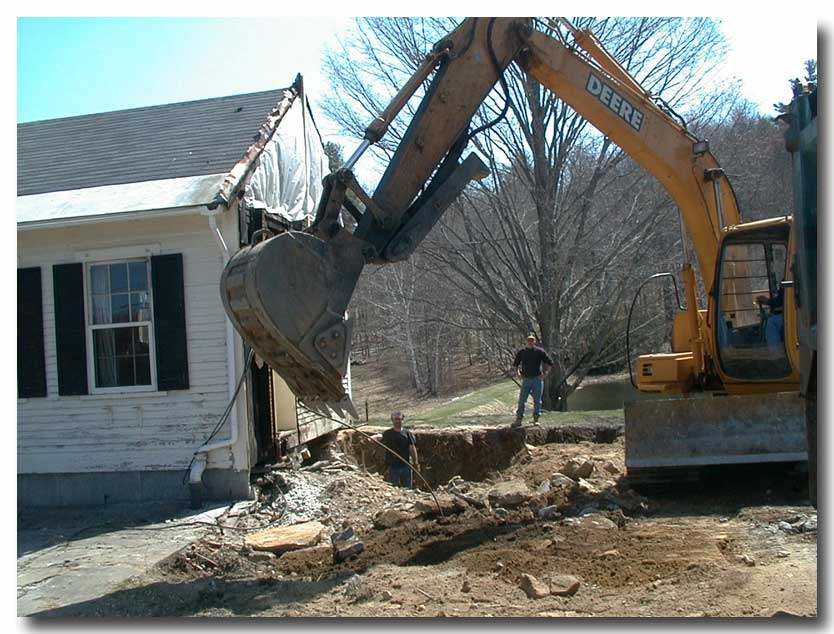
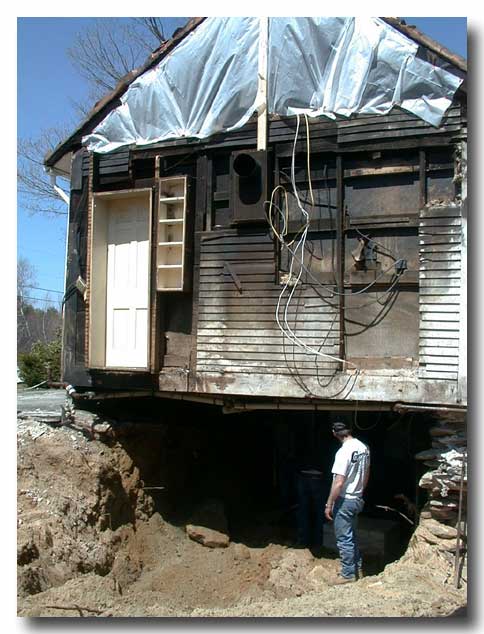
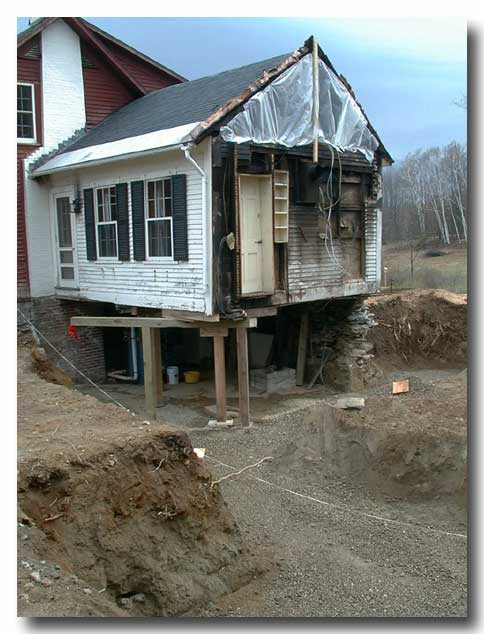
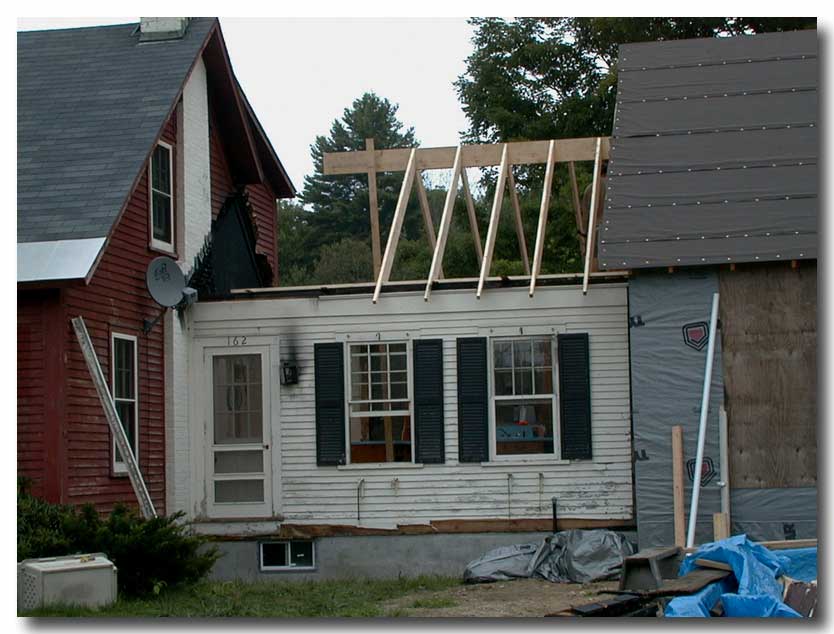
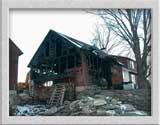
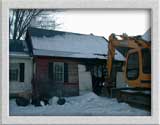
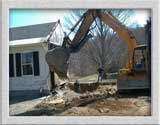
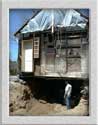
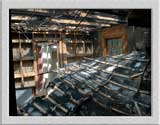
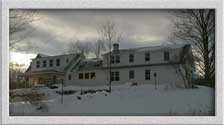
We had a fire in December caused by smoldering ashes improperly handled. A lesson learned the hard way. We were very lucky that we didn't lose the whole house. Two days after the fire we had people come to remove the unsafe portion of the house and winterize the exposed end (shed on the right). We were really lucky that we had already been in touch with a general contractor, Steven Melanson, for a planned renovation that we intended on starting this summer. He was great in coming to our aid and getting us to a point we could make it through the winter. Other contractors that came to our aid were Mark Bushway (did the demolition) and our electrician, Andy Cook . They are all going to be working on the renovation this summer |
|
|
|
 |
 |
|
|
|
 |
|
 |
|
 |
|
|
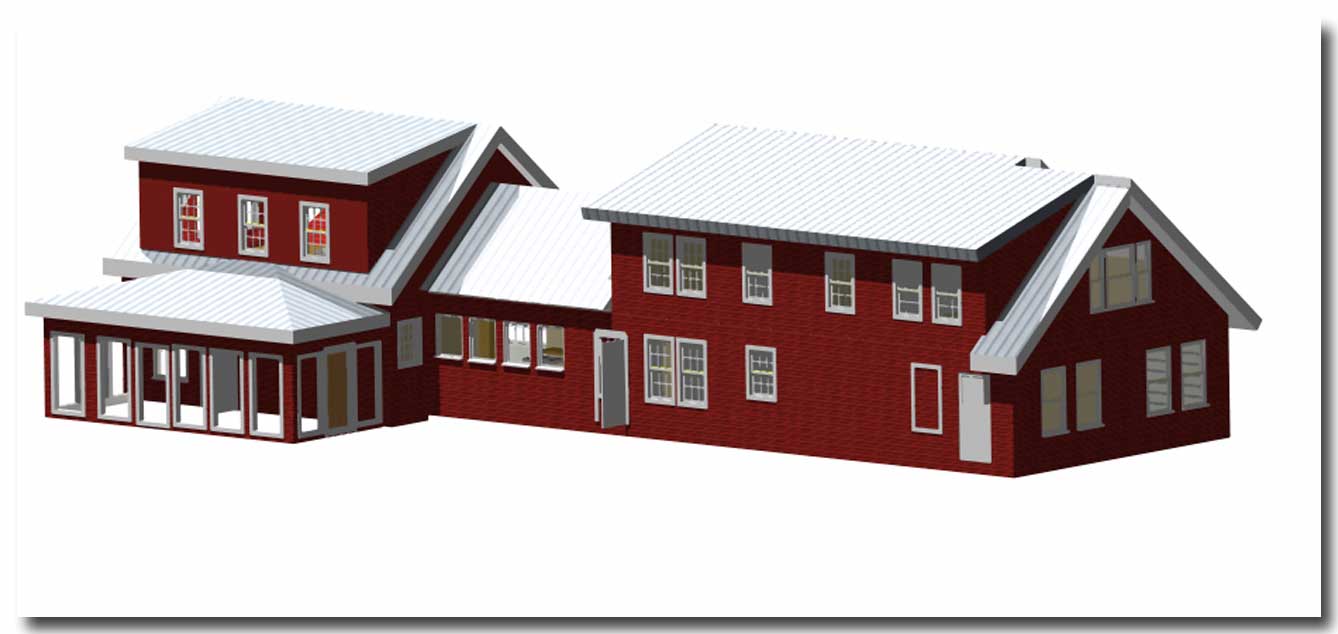
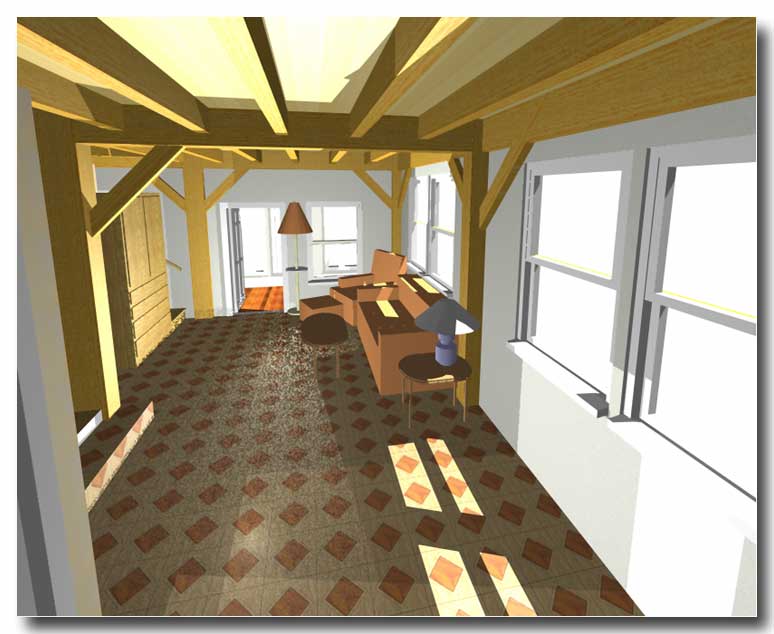
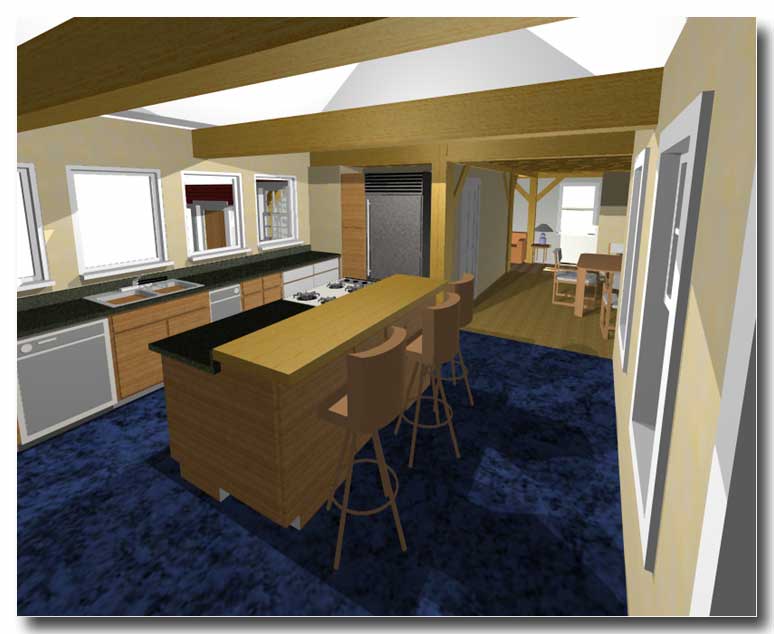
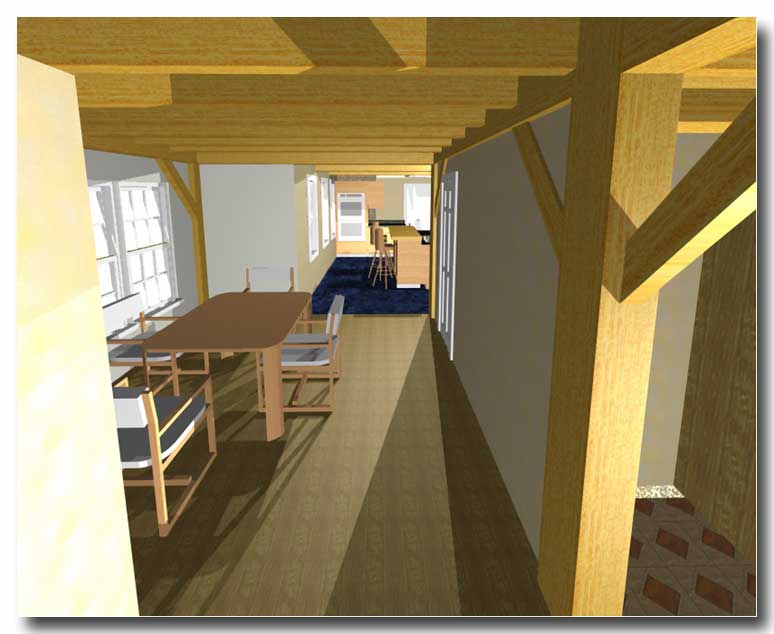
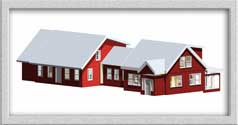
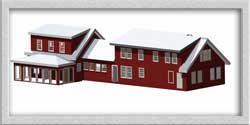
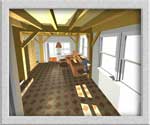
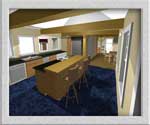
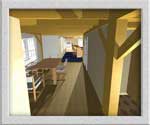
I have a architects design program that I have slowly learned and used to design the renovation of the house. Steven has done much of the design work, especially with regard to keeping the house within appropriate style and structural design. The program will generate typical plans, as well as the generated images shown above. The top images show the front of the house on the left and the back on the right. Below shows the family room (new addition lost in the fire on the right of the house) on the left. Kitchen in the middle and the dining room on the right. Probably a little distorted but the program gives a better visual understanding of what we hope to achieve. |
|
|
|
 |
|
 |
|
 |
|
 |
|
|
|
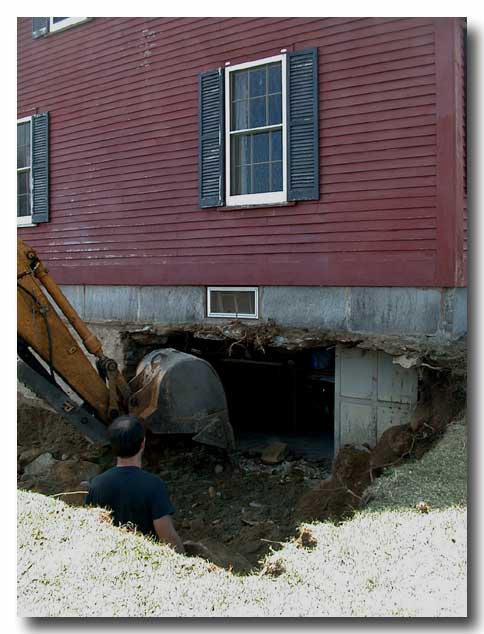
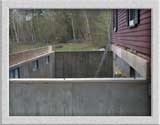
These pics show the excavation for the foundations. The 3 on the left are the excavation for the family room and kitchen. The one on the right is of the addition on the other side of the house. This will have a full basement connected to the existing basement. The hole is where there was a stone foundation which was removed and will act as a door into the new basement area. |
|
|
|
 |
|
 |
|
 |
|
|
|
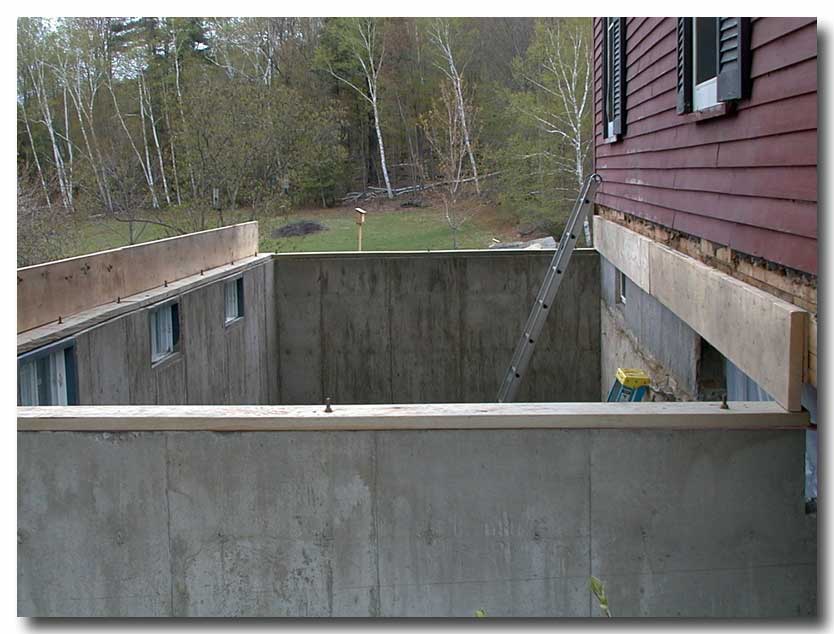
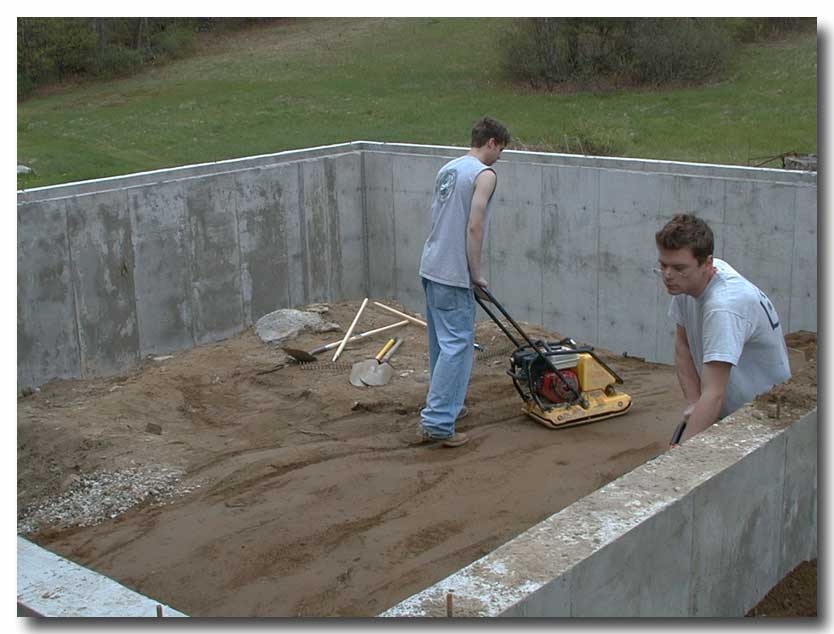
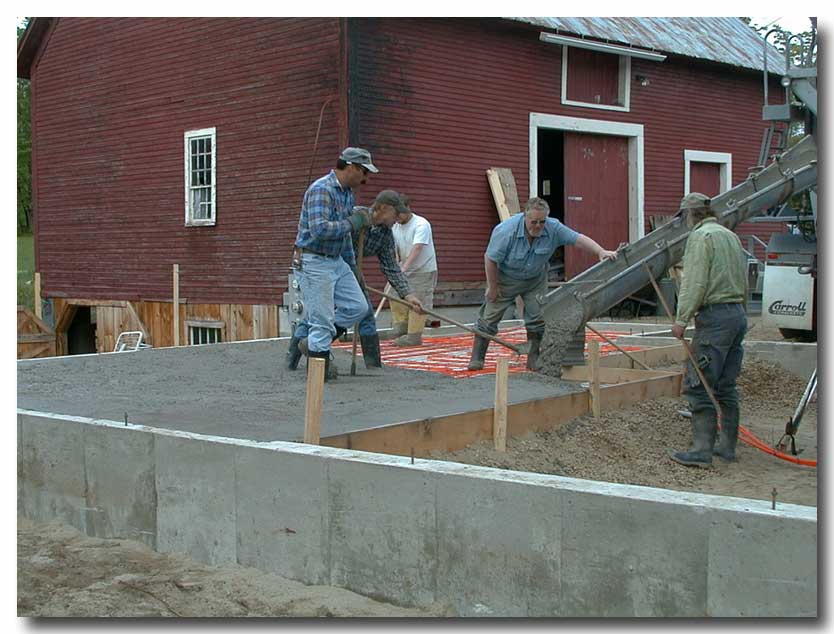
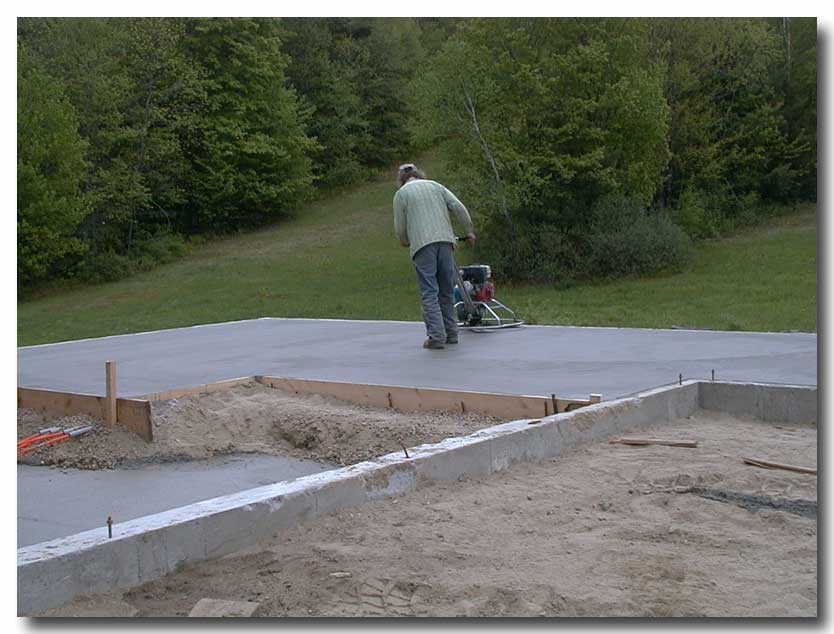
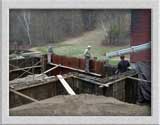
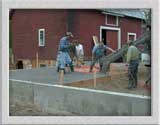
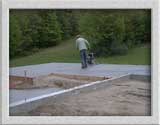
Above are pictures of the foundation forms, the pour and the final foundations for both the rebuild of the south side and the addition on the north side. The north side will be a full basement with a new root cellar. The south side will have a crawl space on half and a poured slab on the rest (shown next). |
|
|
 |
|
 |
|
 |
|
|
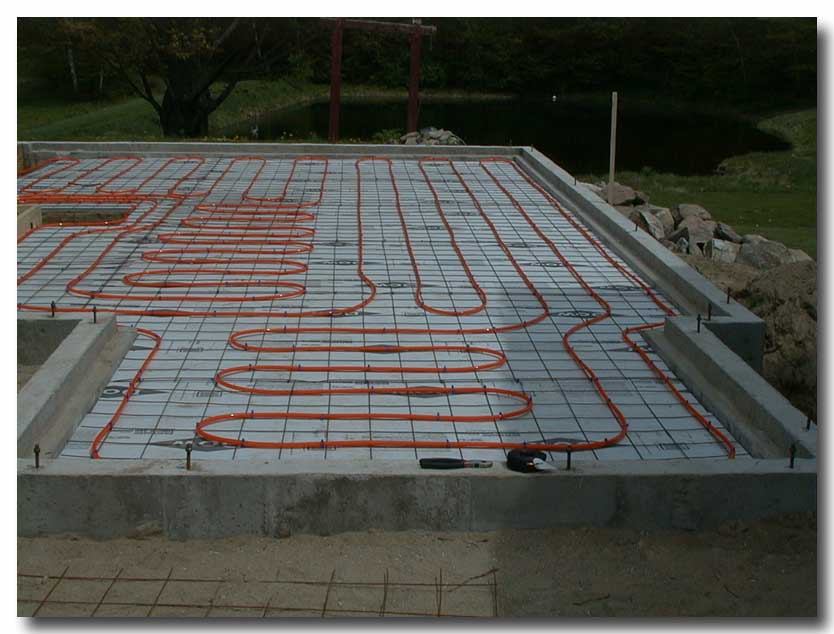
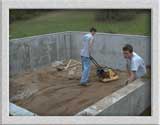
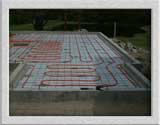
We are replacing the old steam heat system with a combination of radiant floor heat in the kitchen, family room and dining room, baseboard in the south addition, and hot water heat in the existing structure (minus the kitchen). The pictures above show the tubing being poured into the slab which will be the floor of the family room. Our plumber will convert the radiators used for steam in the existing house into hot water radiators, cutting down costs and the need for demolition. |
|
|
|
 |
|
 |
|
 |
|
 |
|
|
|
 |
|
 |
|
 |
|
|
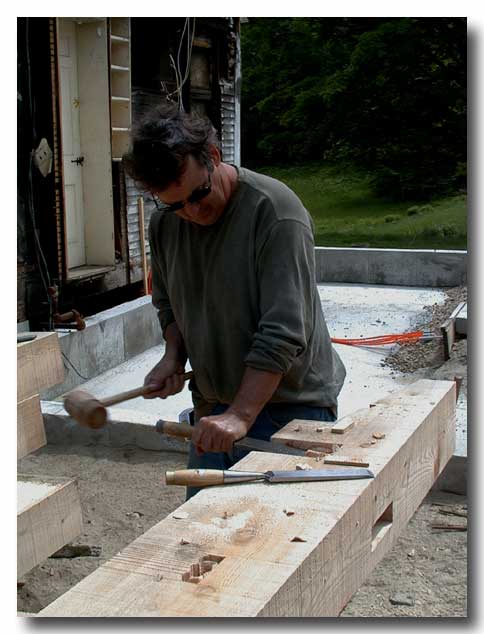
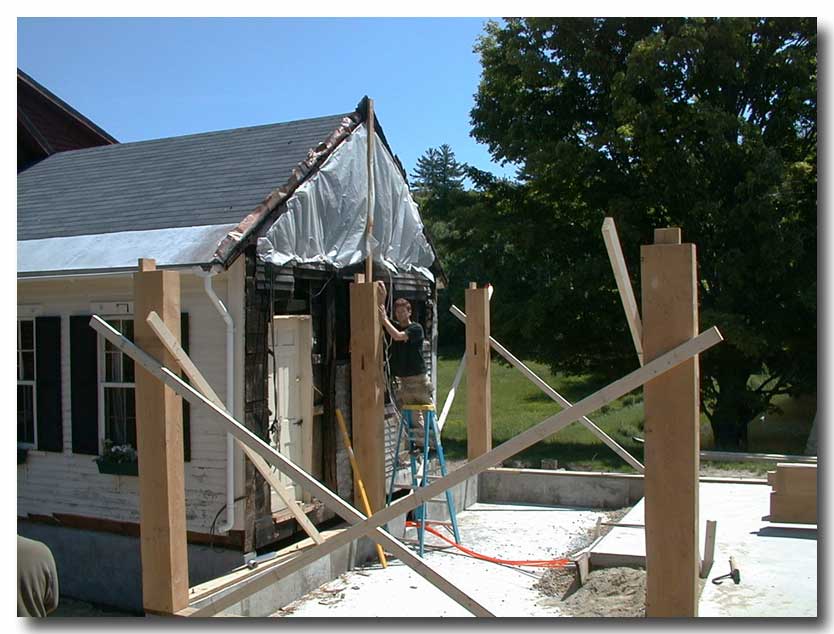
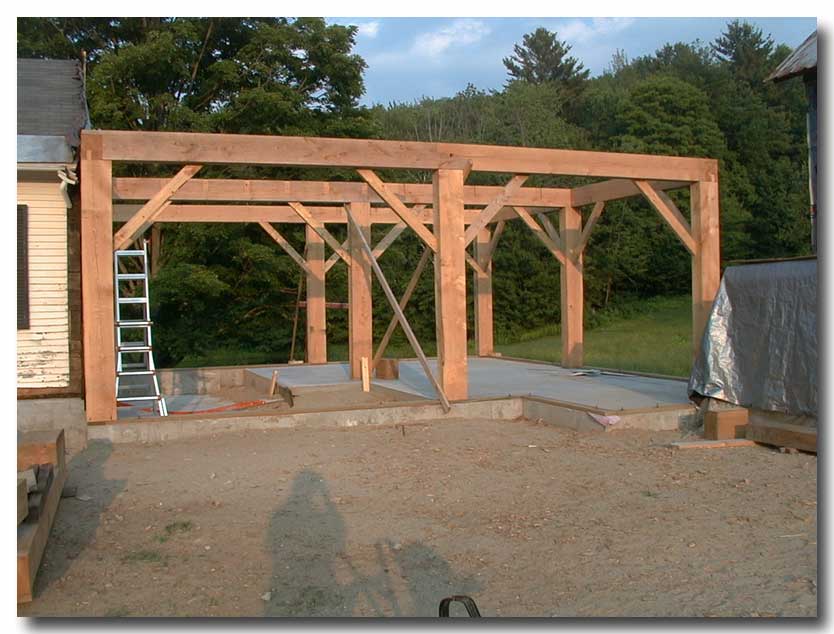
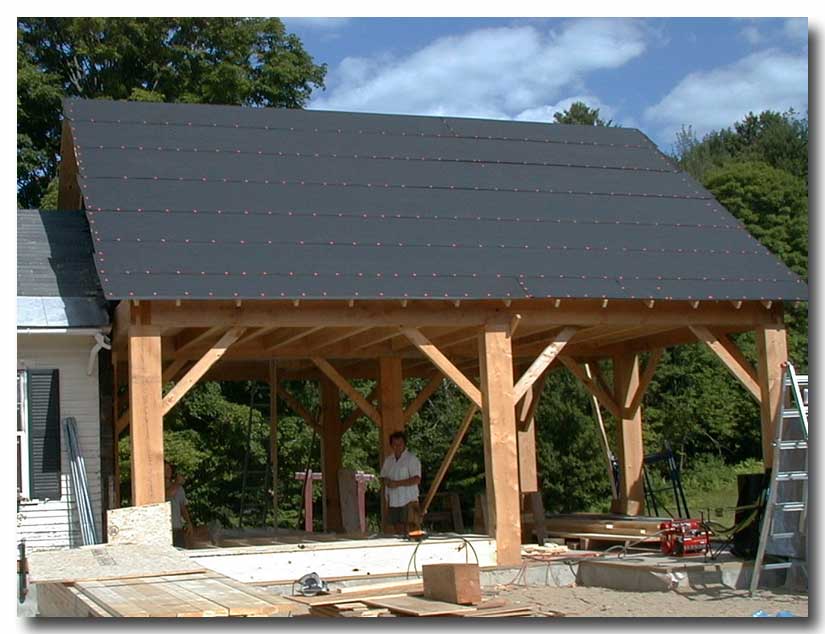
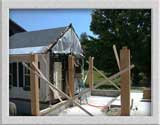
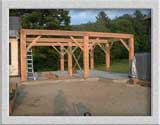
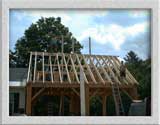
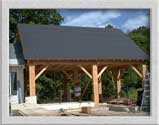
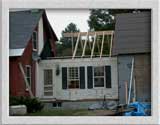
The picture on the top left shows the framing and sheathing for the first floor of the north addition. Steven did this while waiting for the concrete work to be completed on the south. Eventually he will add the second floor and roof, and remove the existing outside wall on it. We won't do this till work on the kitchen and south addition is fairly complete. The rest of the pictures show Steven and Riley working on the timber framing for replacing the structure lost in the fire. The day that the crane was here to erect the timber frame was exciting. Steven cut all the mortises and tenons for the frame without a dry fit, and with only the plan in his head. It went together with nary a hitch. Pretty awesome! |
|
|
|
 |
|
 |
|
 |
|
|
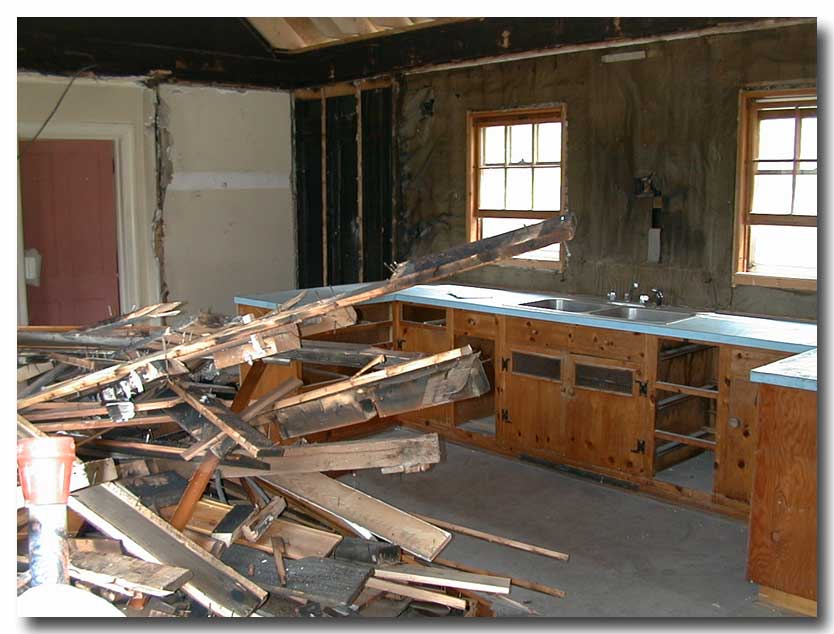
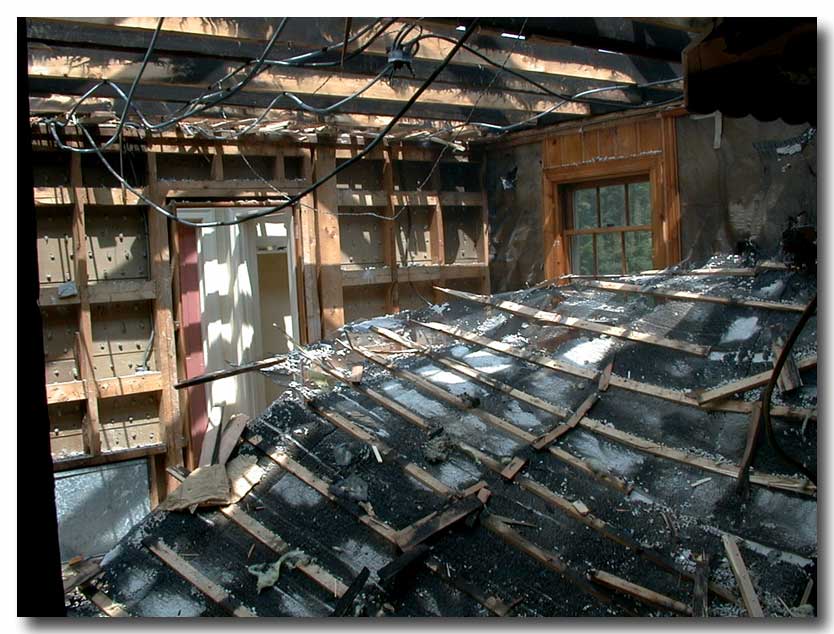
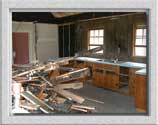
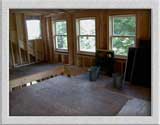
| These pictures show the demolition of the kitchen, including the roof. Steven and Riley (and Seth) did the demolition and re-roofing in 4 days. |
|
|
 |
|
 |
|
 |
|
|
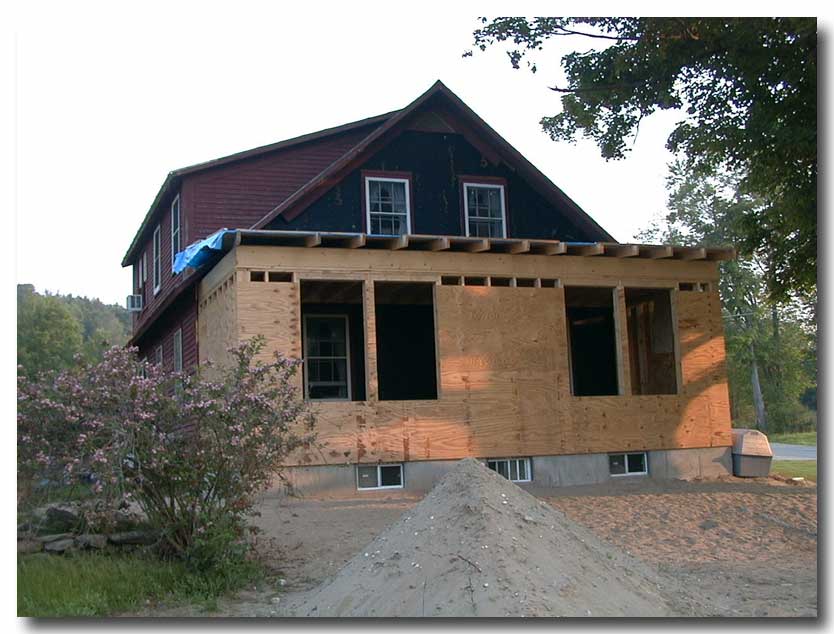
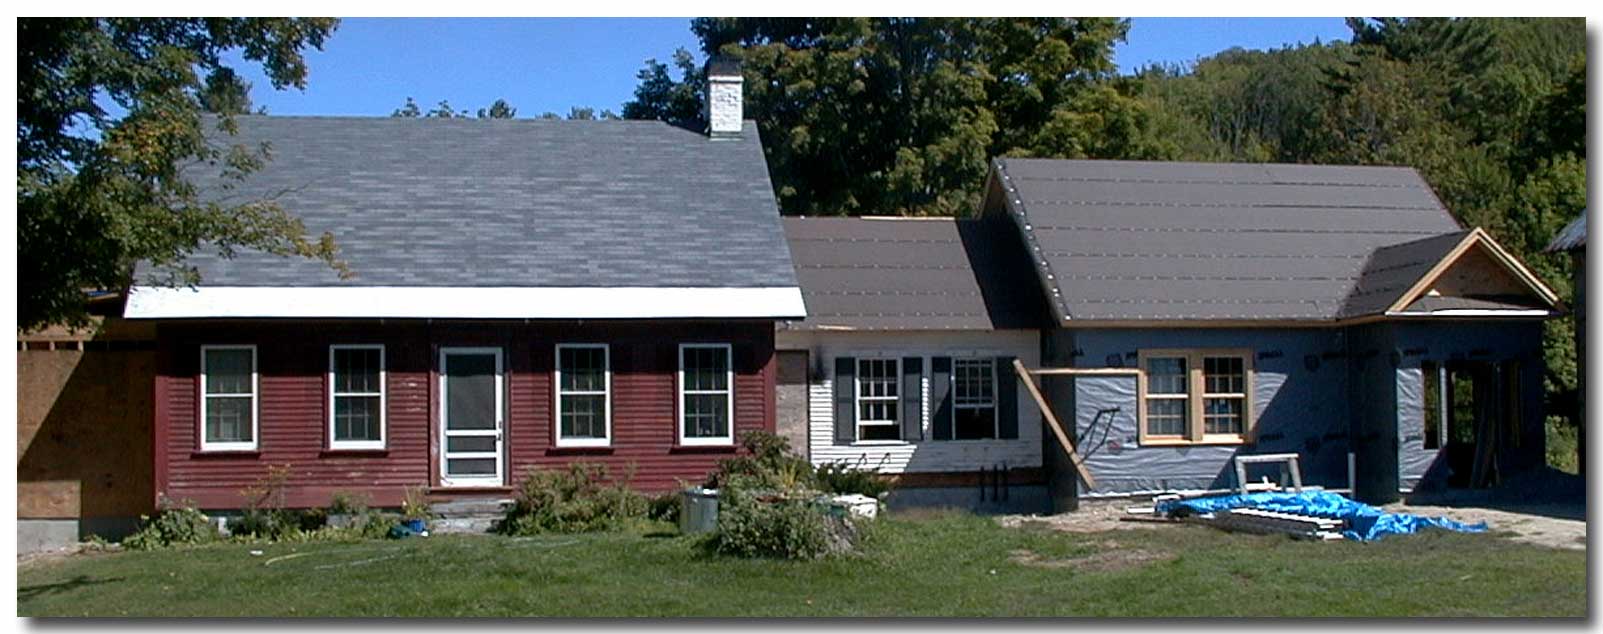
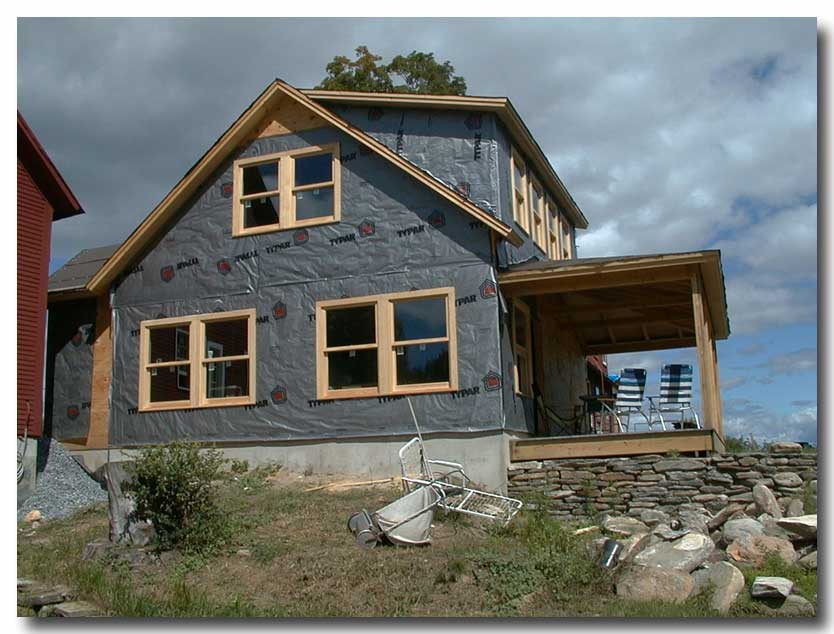
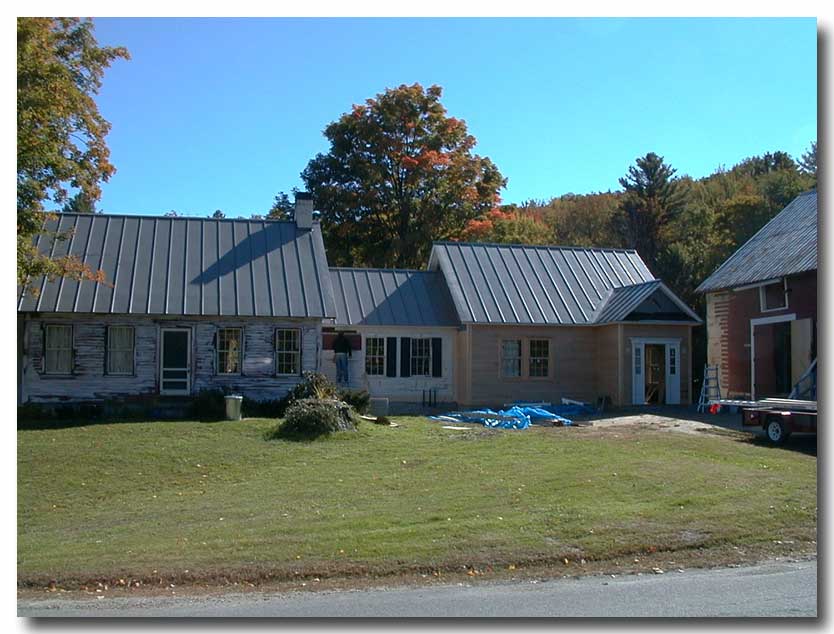
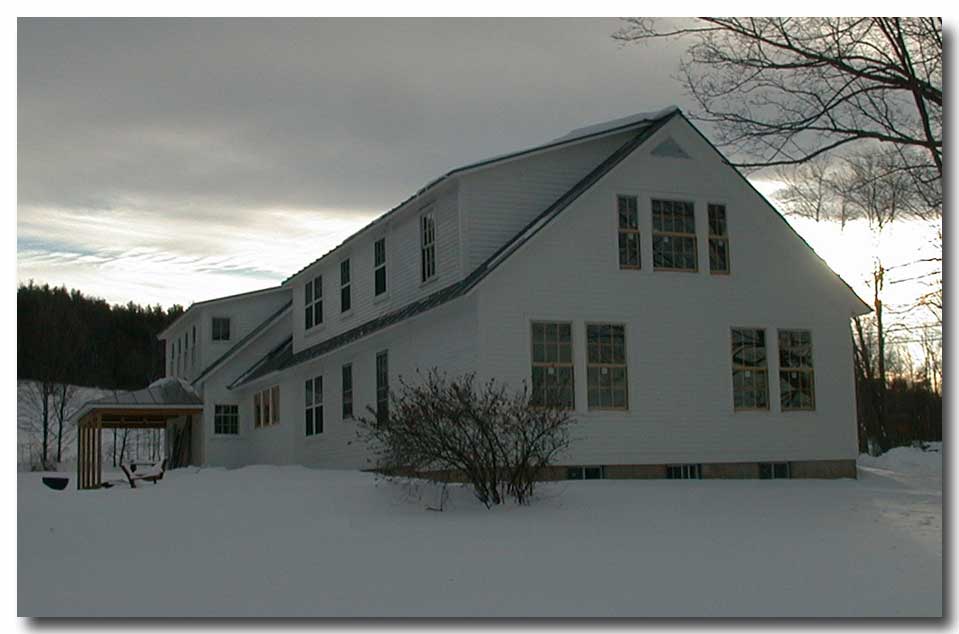
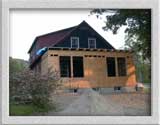
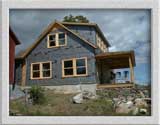
| Different views of the south addition with windows. All that's left to do on the exterior now is clapboard siding and paint. |
|
|
|
 |
 |
|
 |
|
 |
 |
|
|
|
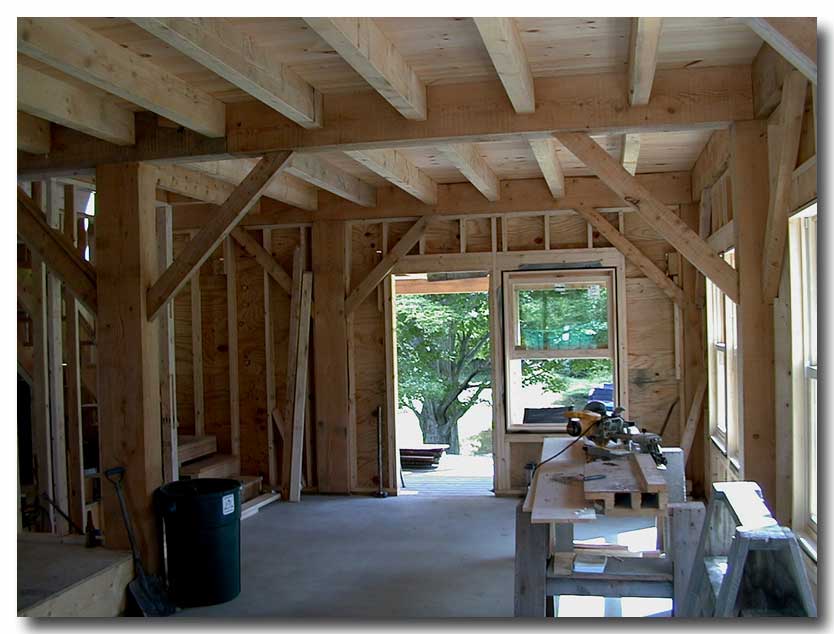
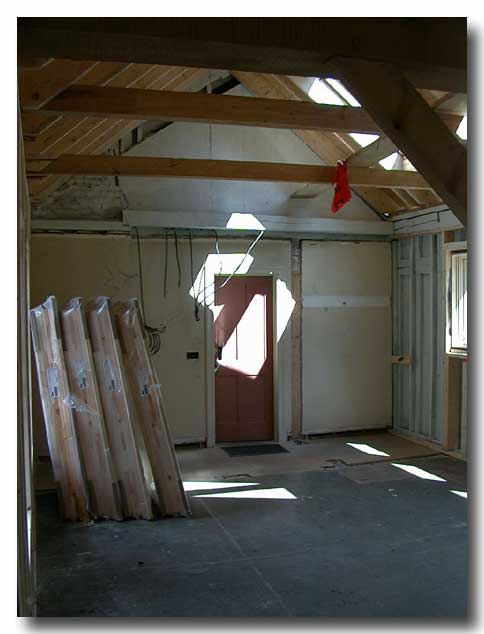
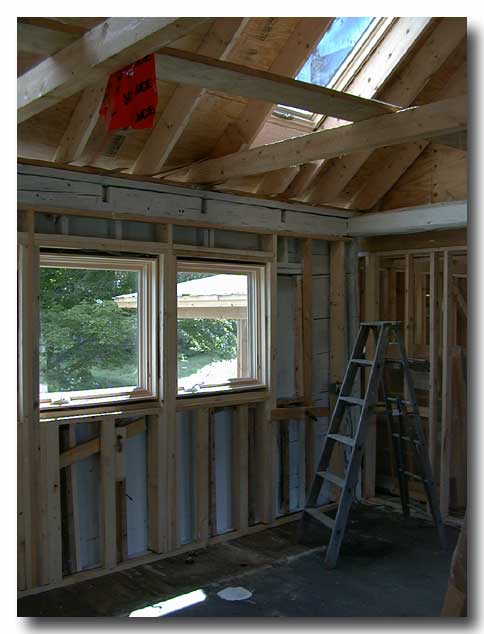
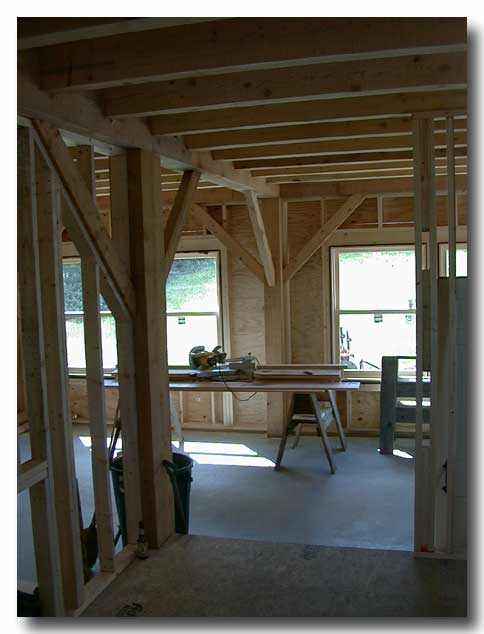
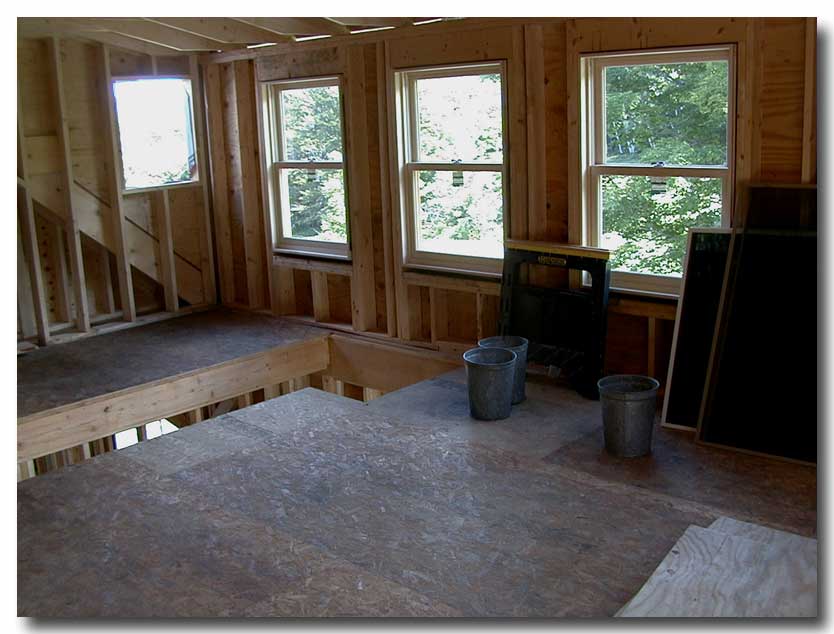
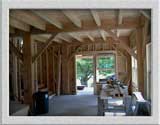
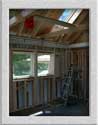
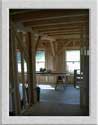
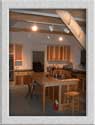
Views of the framed interior spaces. Left is the family room from the entrance. The next two are views of the kitchen. Second from right is the family room from the dining room. Right is Susan's sewing room |
|
|
|
 |
|
 |
|
 |
|
|
|
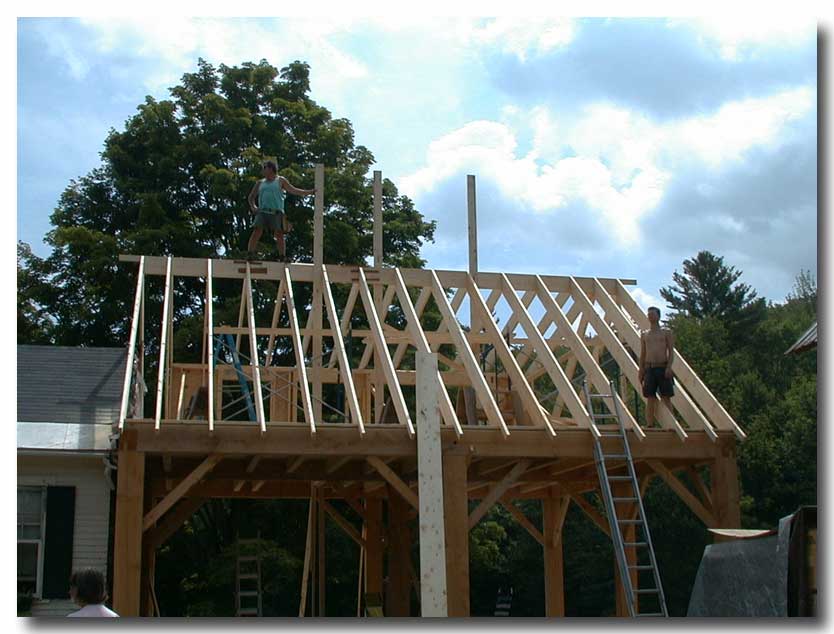
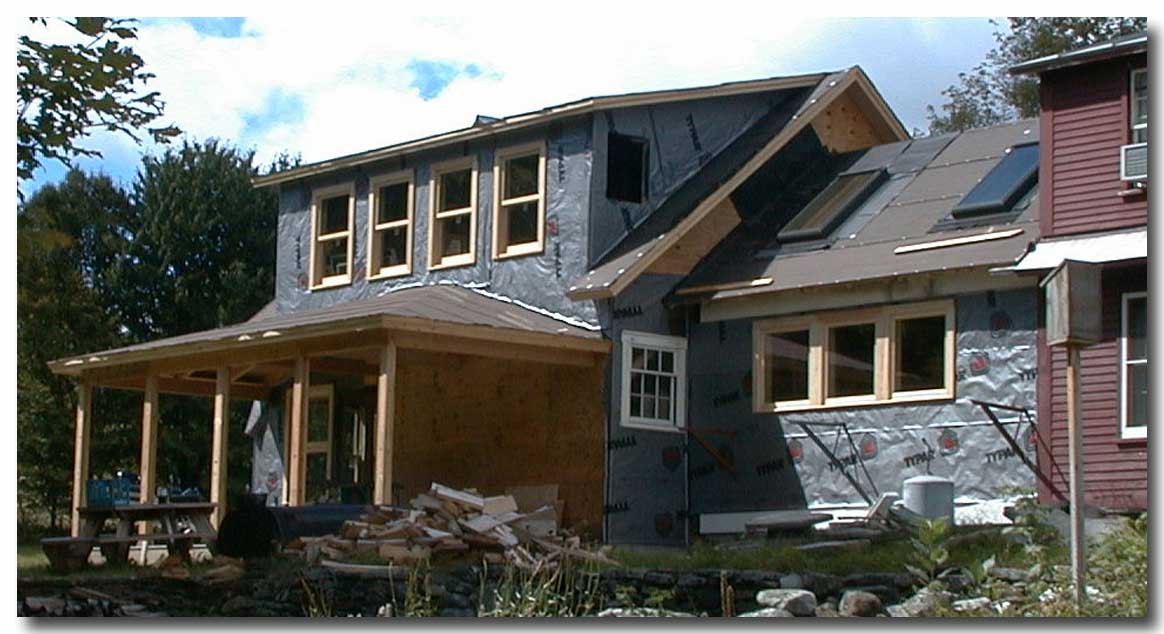
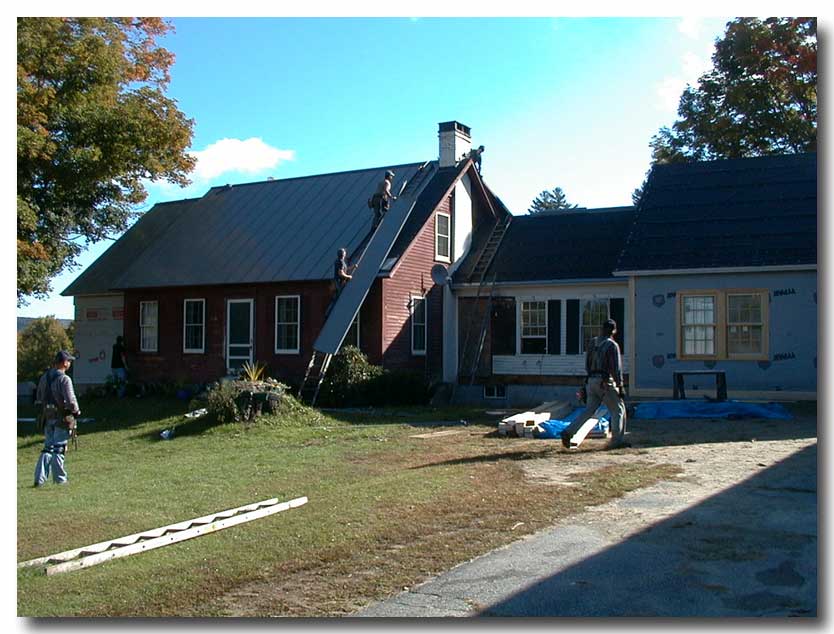
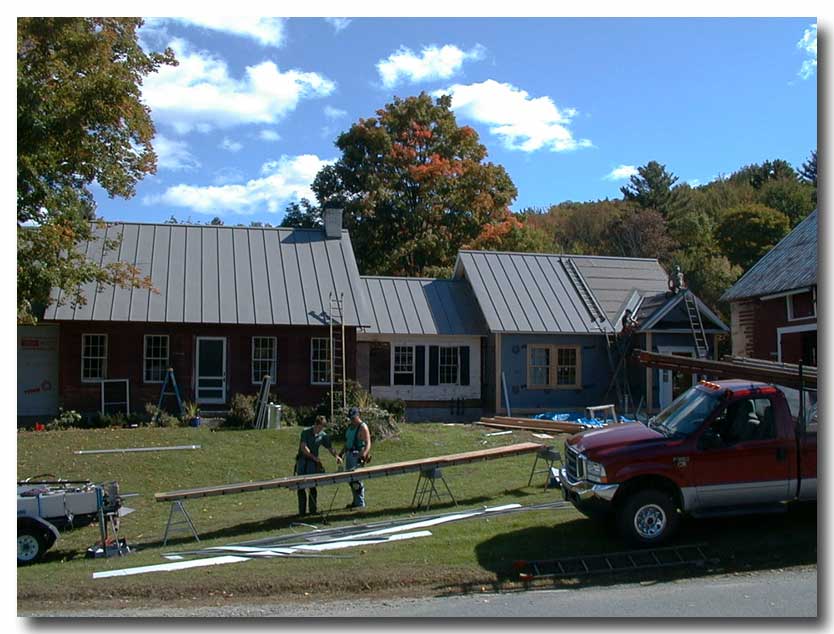
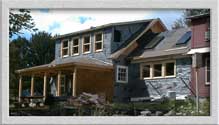
Here the new standing seam metal roof is being installed. It only took 1 1/2 days for them to complete the roof. Notice also that Steven and Riley have completed siding and priming the house during the same period. |
|
|
|
 |
|
 |
|
 |
|
|
|
 |
|
 |
|
 |
|
|
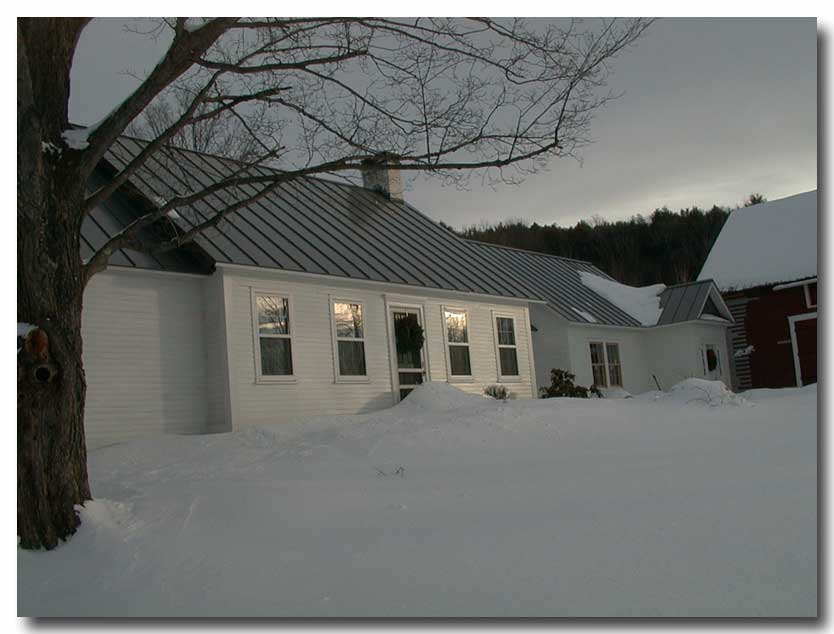
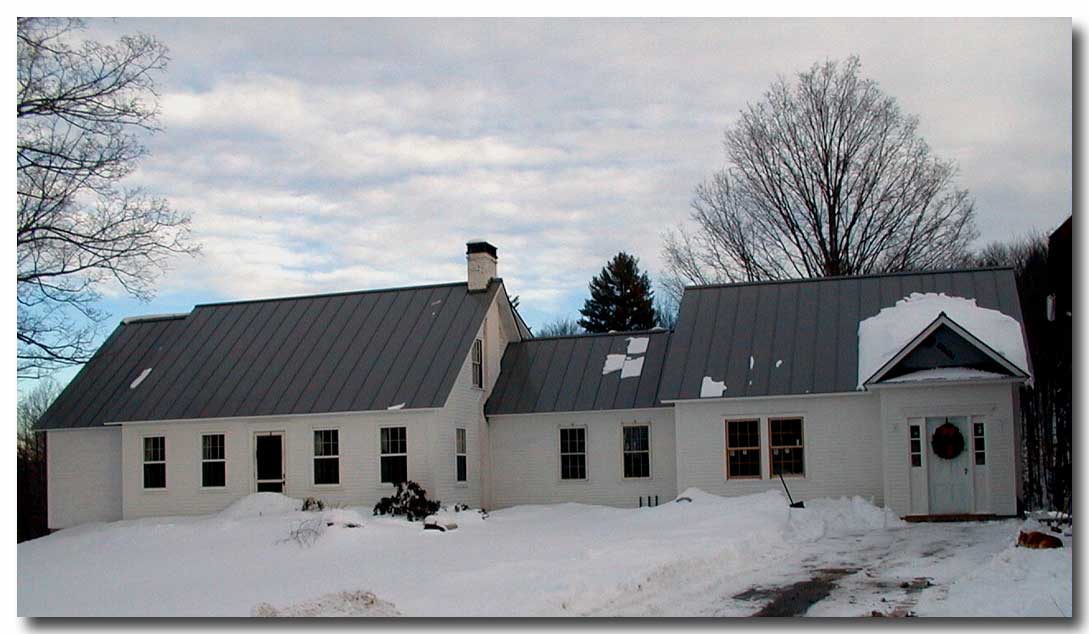
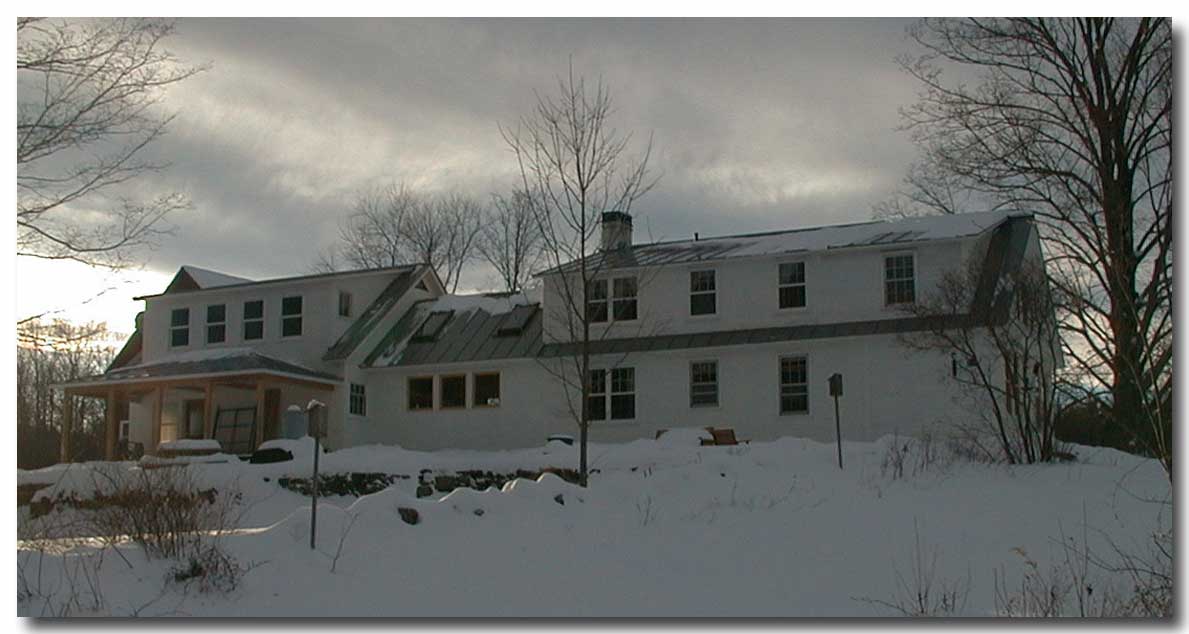
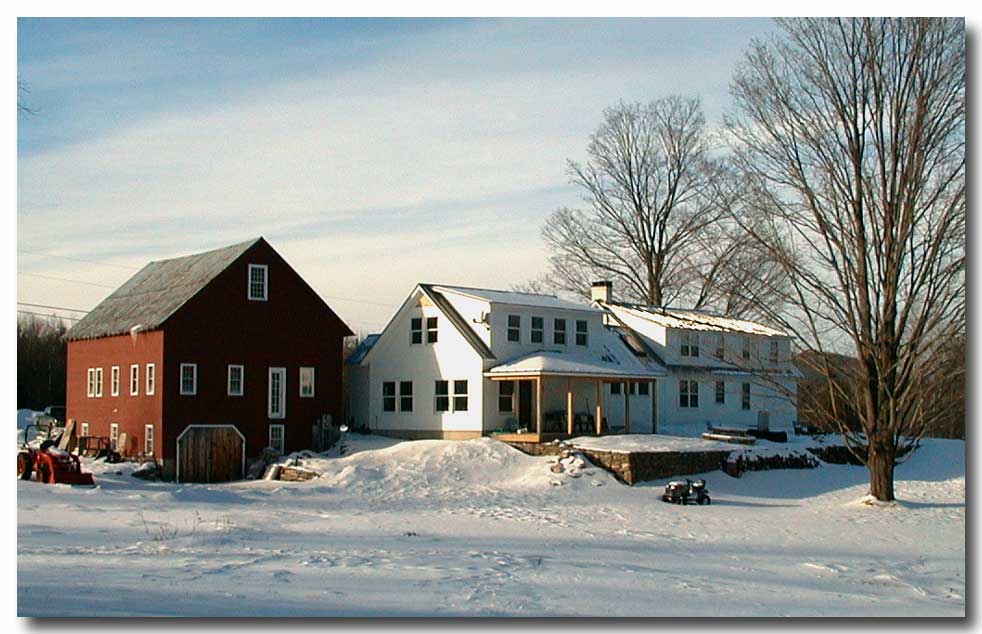
I took these shots this winter but have been delinquent getting them onto the page. These photos show the current state of the exterior. It's almost done. We still have some painting to do on the barn and some of the house, but that will have to wait till I can get to it this summer. I will also finish the porch on the back. It will be a screened porch (but not glassed). We also have a lot of work to do in landscaping with stonework, patio etc.... |
|
|
|
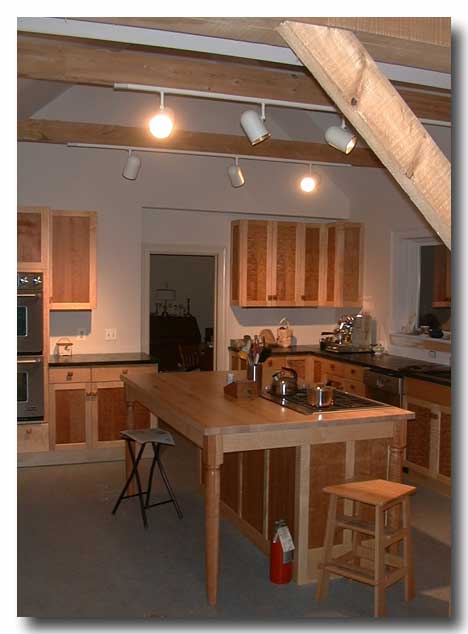
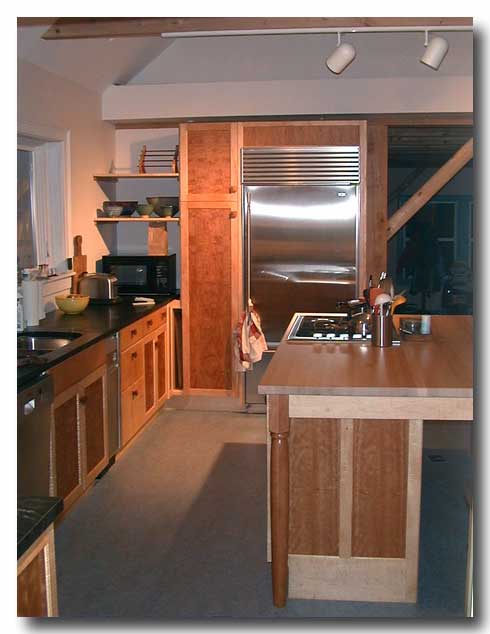
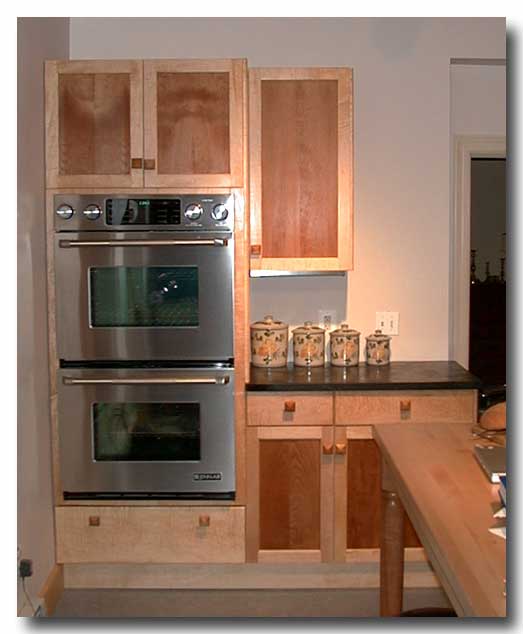
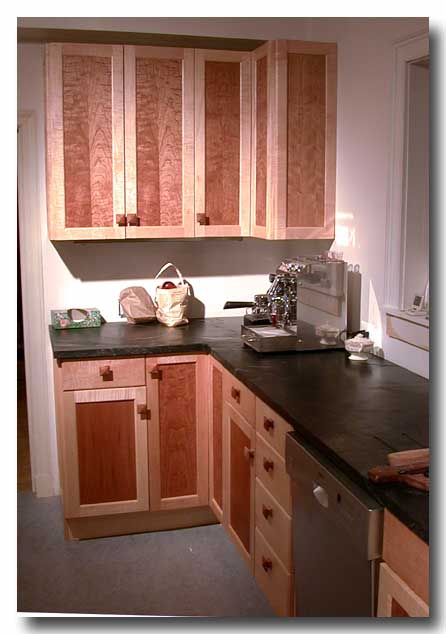
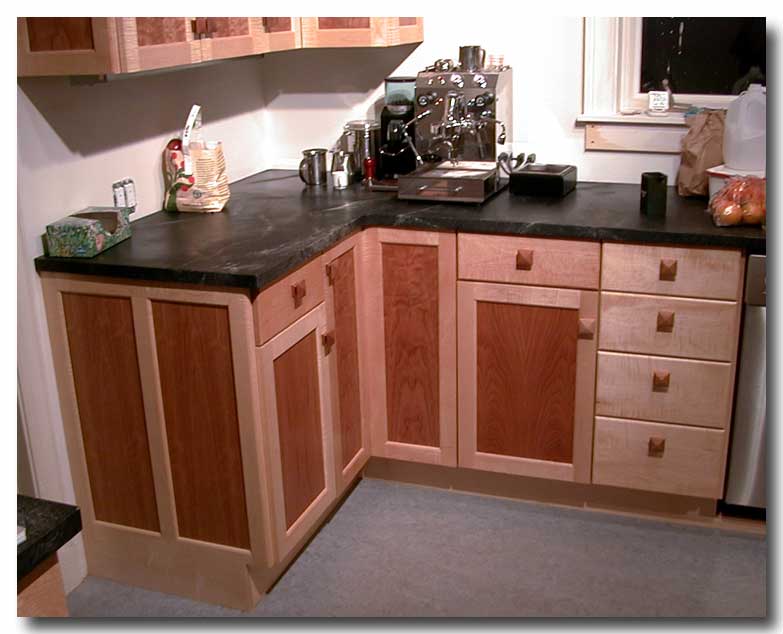
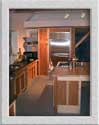
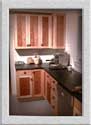
The kitchen (my big project) is almost finished as well. I tried to give a feel for the space with the pictures, but was limited by the lack of a wide angle lens. The color rendition is not perfect either, but close. We now have the trim on the windows painted (although it is too bright a turqoise for my taste). The backsplash is the only thing left to do. We have the field tiles ordered, but they are not here yet. |
|
|
|
 |
|
 |
|
 |
|
 |
|
 |
|
|
|
View from dining room
|
|
View from living room
|
|
View of ovens from dining room
|
|
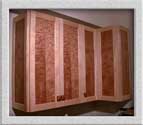
Wall cupboards and counter
|
|
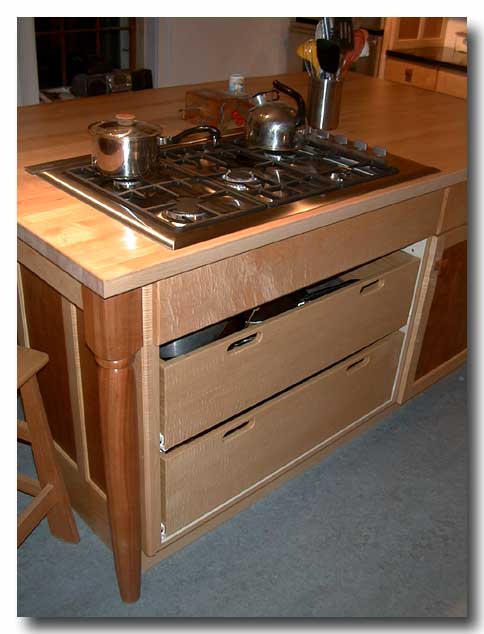
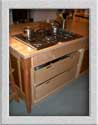
Propane cooktop in the island.
|
|
|
|
 |
|
 |
|
 |
|
|
|
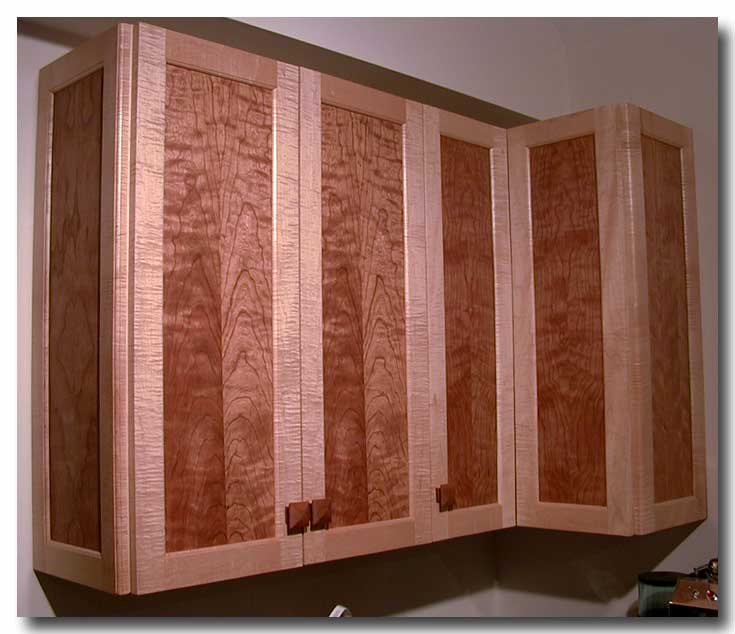
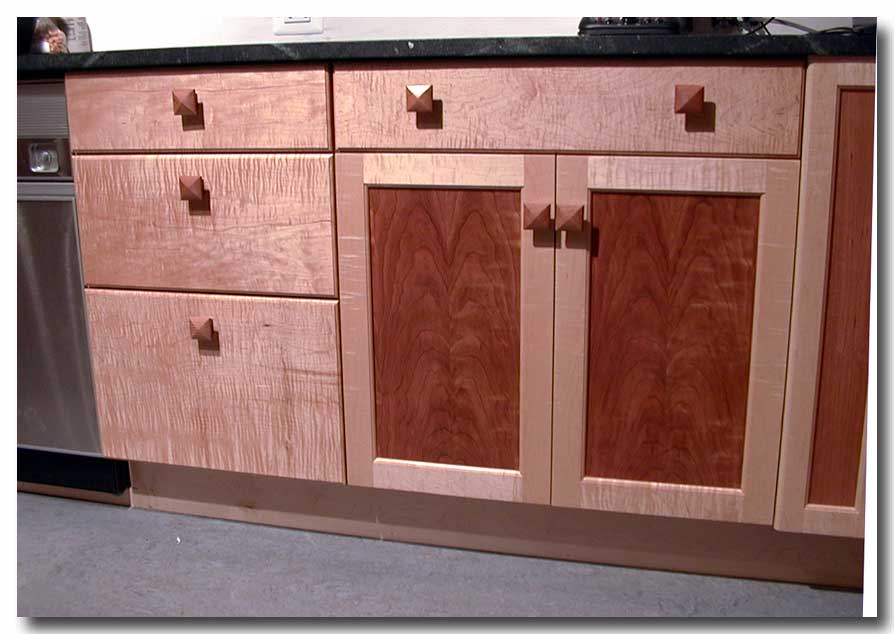
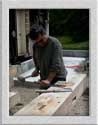
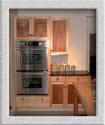
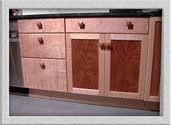
These pictures show some of the woodwork. It is hard to capture the true lustre of the wood. I used curly maple and cherry plywood (a lot of it curly as well) for the cabinets. The knobs are cherry as well, but I cheated and bought these instead of making them myself. There a lot of pull-out drawers behind the doors that you can't see. The cabinet by the fridge is a bank of pull out drawers to serve as a pantry. All of the drawers were dovetailed and made of ash. The island top is a 7' by 4' slab of butcher block maple. I bought 2 pre-laminated slabs 2'x8', glued them together and resized them. Doing it this way saved me the job of laminating the maple. I couldn't buy the amount of maple needed for the project for less than what I paid for the finished slabs. I actually got to do some turning (the cherry legs) for the island skirt. The intention was to make the island look somewhat like a piece of furniture.
|
|
|
|
 |
|
 |
|
 |
|
|
|
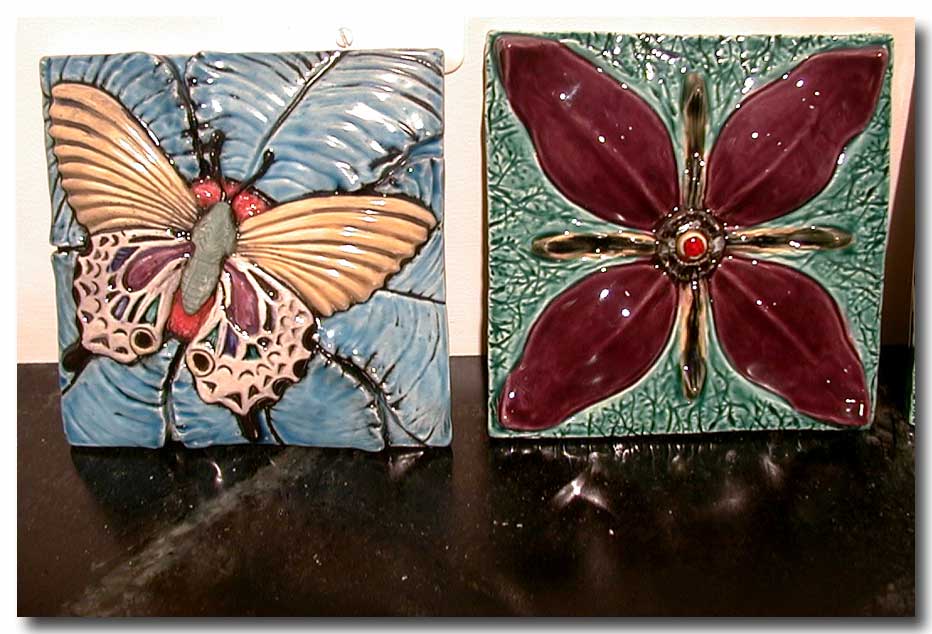
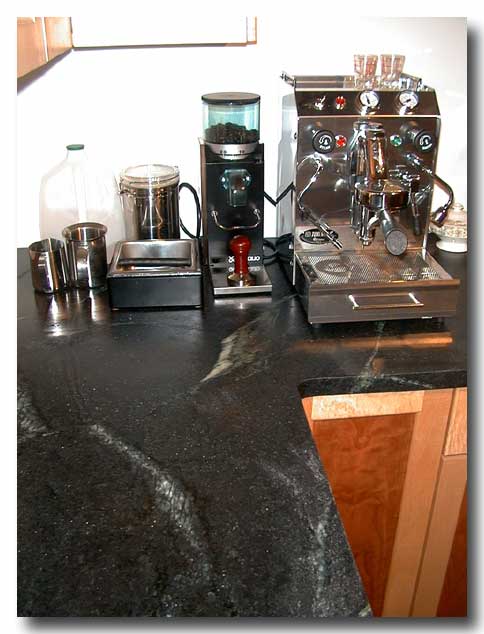
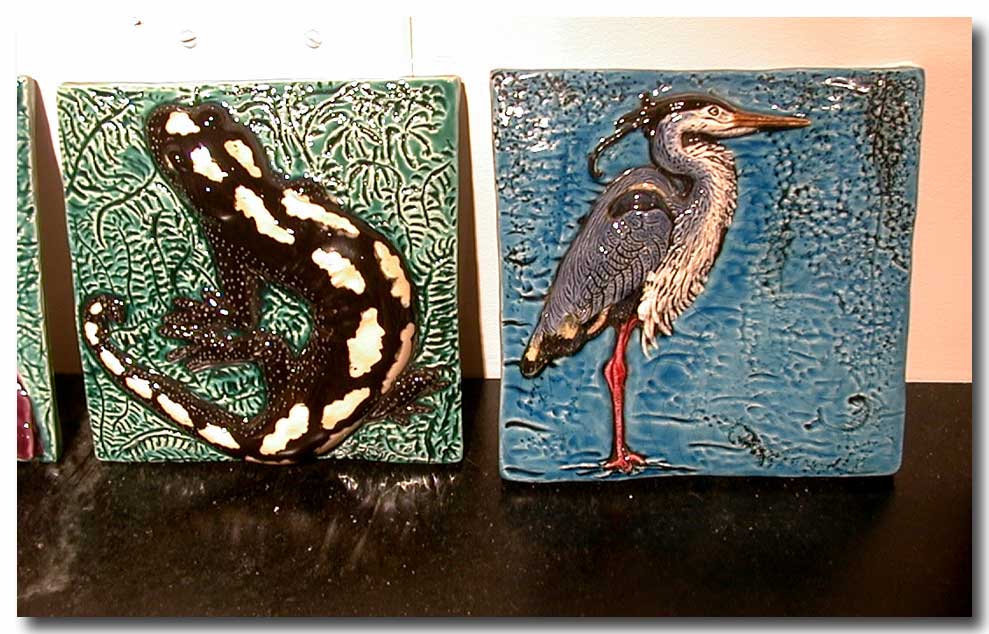
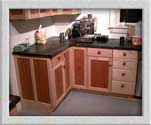
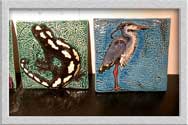
The center picture is meant to show the counter. We had intended on having a soapstone countertop all along. The house originally had soapstone counters. There used to be a soapstone quarry very near us, however all of the soapstone available now is imported from South America. There is a soapstone company right here in Springfield that we checked out, but their soapstone was a bland gray, and we found them to be pretty snooty and high priced. While looking for tile for the family room we happened on a small company (Stepping Stone Tile in Claremont, NH) that doesn't advertise. They had sample counters of the soapstone we bought and we fell in love with it. It is called Ice-flower soapstone (also from South America). They did an excellent job installing the counter that was significantly less than the local company, and couldn't have been nicer. The two other pictures above show 4 of the 9 special tiles that Susan had made for the backsplash. She bought 2 at a craft fair in Oregon on one of my trips for orthodontic continuing education while I was working in Sitka. She asked the artist to complete a few more for us, including the one of the salamander. Susan actually sent her a picture of one of the salamanders that live in our pond, and this was the result . All of the tiles represent life found in the pond.
|
|
|
|
 |
|
|
|
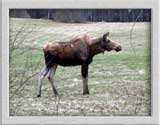
We had a visitor yesterday (4/26) and I just had to post a picture. I went out to retrieve a box from the barn and this moose was just strolling across our lawn. She hung around for quite a while and allowed me to get close enough for this picture (about 10 yards). She didn't seem to be the least bit perturbed. Pogo and I saw her in the woods on one of our walks a few days ago, but not this close and I didn't have a camera. |
|
|
|
|
|
|
|
|
|
|
|
|
|
|
|
|
|
|
|
|
|
|
|
|
|
|
|
|
|
|
|
|
|
|
|
|
|
|
|
|
|
|
|
|
|
|
|
|
|
|
|
|
|
|
|
|
|
|
|
|
|
|
|
|
|
|
|
|
|
|
|
|
|
|
|
|
|
|
|